Tile Shower Installation in Massachusetts
Custom tile shower installation done in-house — subway, herringbone, mosaic, slab, natural stone, and full-height feature walls. We handle the tile work that other contractors subcontract out.
Tile work in a shower is one of the few parts of a bathroom remodel where the difference between excellent and merely okay is immediately visible — and stays visible for the next 25 years. Crooked grout lines, mismatched cuts, uneven spacing, lippage between tiles, and grout that crumbles after two years are all the result of rushed installation, not bad materials.
At JM All-Pro Services, we do tile shower installation in-house. We don’t subcontract tile to outside crews because tile is a craft, and consistency requires the same hands setting the first tile and the last. We use proper waterproofing systems (Schluter Kerdi or RedGard), correct thinset for each tile type, and we plan the layout before the first piece is cut so the pattern lands right at corners, niches, and edges.
Tile Materials We Install
Each tile material has different installation requirements, different cutting techniques, and different long-term performance characteristics. Here are the tiles we work with most often in Massachusetts shower projects:
Porcelain Tile
Densest, hardest tile — under 0.5% water absorption. Best long-term performance for shower walls and floors.
Ceramic Tile
Softer than porcelain, easier to cut, more affordable. Excellent for shower walls (not always recommended for floors).
Natural Stone
Marble, travertine, slate, limestone. Each piece unique. Requires sealing during install and periodically after.
Mosaic Tile
Small tiles (1″-2″) on mesh sheets. Often used for floors, accent strips, niche backs, or full feature walls.
Glass Tile
Transparent or back-painted glass. Reflects light, makes showers feel larger. Special thinset required for proper bonding.
Large-Format Slab
Single porcelain or quartz panels (up to 5’×10′). Almost no grout lines. Modern, seamless look. Heavy — needs proper substrate.
Tile Patterns & Layouts
The pattern you choose changes how the tile reads — vertical patterns make ceilings feel higher, horizontal patterns widen narrow showers, diagonals add motion. Here are the most popular layouts we install:
▬▬▬
▬▬▬
Running Bond (50% Offset)
Classic subway pattern. Each row shifts half a tile. Most popular, easy to install, timeless.
▬▬▬
▬▬▬
1/3 Offset Brick
Modern variation of running bond. Each row shifts 1/3 instead of 1/2. Reduces visible lippage.
▤▤
▤▤
Stacked / Grid
Tiles aligned in a perfect grid. Very modern, clean look. Requires straight walls and precise installation.
⬣⬢⬣
⬢⬣⬢
Herringbone
Rectangular tiles set at 45° in a V-pattern. Adds visual energy, works great on accent walls and floors.
◇◇◇
◇◇◇
Diagonal / Diamond
Square tiles rotated 45°. Creates diamond shapes. More cuts than standard layouts but adds character.
▯
▭
Vertical Stack
Tiles stacked vertically instead of horizontally. Visually lifts the ceiling — great in showers with low ceilings.
▦▦
▦▦
Mosaic Field
Small tiles covering entire wall or floor. Highly decorative, slip-resistant on floors, time-intensive to install.
━━━
▰▰▰
Field + Accent Strip
Main tile broken up by a horizontal band of mosaic, glass, or contrasting tile at eye level.
Specialty Tile Features We Build
The base tile install is one thing — the details are what separate a builder-grade shower from a custom one. These are the features most homeowners ask about:
Recessed Wall Niches
Built-in shelves recessed into the wall for shampoo, soap, razors. Sized to fit standard product bottles (usually 14″×14″ or 14″×24″).
Accent Strips / Listellos
Horizontal band of contrasting tile — mosaic, glass, metal, or natural stone — usually at eye level. Adds visual interest without overwhelming the design.
Feature Wall (Accent Wall)
One wall uses a different tile, pattern, or material than the rest of the shower. Common: 3 walls in subway, back wall in slab or mosaic.
Built-In Tile Bench
Framed and waterproofed bench inside the shower for seating, shaving legs, or accessibility. Tile is wrapped over the entire bench surface.
Linear Drain with Single-Slope Floor
Long, narrow drain along one wall. The entire shower floor slopes in one direction toward the drain instead of toward a center point.
Curbless Tile Floor (Wet Room)
The shower floor sits flush with the bathroom floor — no curb to step over. Tile continues unbroken from inside the shower to the rest of the bathroom.
Schluter Edge & Trim Profiles
Metal or color-matched profiles that finish the edges of tile cleanly — at curbs, corners, niche openings, and where tile meets drywall.
How We Install vs. How Many Don’t
The difference between a tile shower that lasts 25 years and one that fails at year 5 isn’t the tile — it’s what’s behind the tile. Here’s how we approach it:
Modern Waterproof Membrane System
- Schluter Kerdi or RedGard waterproof membrane on every surface
- Sealed seams at every corner, drain, and penetration
- Pre-sloped foam shower pan (Kerdi Shower Tray)
- Cement backer board OR foam board over membrane
- Modified thinset matched to tile type
- 1/16″ or 1/8″ spacers for consistent grout lines
- Backbutter glass and stone tiles for full bond
- Silicone caulk in change-of-plane joints (NOT grout)
Cement Board & Tar Paper Method
- Tar paper or vapor barrier behind cement board only
- Cement board treated as if it were waterproof (it isn’t)
- Mortar bed shower pan poured on-site (skill-dependent)
- Standard thinset for everything regardless of tile type
- Inconsistent grout joints
- Grout in corner joints (cracks within a year)
- Untreated penetrations at drain and valve
- Often works for 5-10 years, then starts failing
Grout Choices Matter More Than You Think
Grout is what most people see and touch every day after the shower is installed. Wrong grout choice means shorter shower life, mold, and constant maintenance:
Cement Grout (Sanded)
Traditional grout for joints 1/8″ or larger. Requires sealing every 1-2 years. Stains with regular use. Most affordable.
Best for: large grout lines, budget buildsCement Grout (Unsanded)
Smooth grout for joints under 1/8″. Used with polished tile and glass to avoid scratching surfaces. Still requires sealing.
Best for: glass tile, polished marbleEpoxy Grout
Two-part epoxy. Stain-proof, no sealing needed, lasts forever. Harder to install and 2-3x the cost of cement grout.
Best for: showers, primary baths, low-maintenancePre-Mixed Urethane Grout
Ready-to-use grout that’s stain-resistant. Easier to install than epoxy, mid-range cost. Good middle ground.
Best for: walls in normal use showersSilicone Caulk (Change-of-Plane)
Used in corners and where wall meets floor — NOT grout. Stays flexible so it doesn’t crack with normal house movement.
Best for: ALL corner joints, periodColor Matching
Grout color affects how busy or calm the pattern looks. Matching grout to tile = subtle. Contrasting grout = emphasizes pattern.
Best for: design preferenceOur Tile Shower Installation Process
Tile work in a shower is a phased process. Rushing any phase compromises everything after it. Here’s how we structure the work:
Layout Planning & Tile Calculation
Before any tile is cut, we plan the layout on the walls so the pattern lands properly at corners, niches, and edges. We confirm tile quantities, lot numbers match, and tiles are inspected for defects.
Substrate & Waterproofing
Cement backer board or foam board installed. Schluter Kerdi or RedGard waterproof membrane applied to all walls, floor, niches, and bench. All seams and penetrations sealed.
Shower Pan Construction
Pre-formed foam pan (Kerdi tray) set in mortar bed with proper slope (¼” per foot to drain), OR custom mortar bed built and waterproofed if a custom shape is needed.
Floor Tile Installation
Shower floor tiled first (mosaic for slip resistance is recommended). Tile cut to fit slope and drain assembly. Floor protected before wall tile begins.
Wall Tile Installation
Wall tile laid from bottom up using proper thinset, spacers for consistent grout lines, and pattern alignment checked at every course. Cuts made with wet saw for clean edges.
Niche, Trim & Detail Work
Niche tiled with proper waterproofing. Schluter trim profiles installed at all exposed tile edges. Accent strips, bench tile, and any decorative features completed.
Grout, Cure & Seal
Tile allowed to cure 24-48 hours before grouting. Grout applied, joints cleaned, haze removed. Cement grout sealed after curing (epoxy doesn’t need sealing).
Caulk, Inspect & Hand Off
All change-of-plane joints caulked with color-matched silicone (not grout). Final inspection for any spots needing touch-up. Maintenance instructions provided.
Our Quality Standards
These are the details we check on every tile shower we build. Any one of them can fail a shower in the long run if skipped:
Why Choose JM All-Pro Services
In-House Tile Work
We don’t subcontract our tile work. Same hands, same quality, every project.
Proper Waterproofing
Schluter Kerdi or RedGard membrane on every shower. No shortcuts behind tile.
MA Licensed & Insured
Construction Supervisor License #121166 and HIC #214808 — both active.
Layout Planning First
We map the tile layout before cutting. Pattern lands clean at corners and niches.
Specialty Tile Experience
Comfortable working with glass, large-format slabs, natural stone, and mosaic.
Written Estimates
Full scope, materials, labor, and timeline documented before any work begins.
Service Areas in Massachusetts
📍 Where We Install Tile Showers
Based in Clinton, MA. Tile shower installations across Worcester County, Middlesex County, and MetroWest:
Related Bathroom Services
Tile Shower Installation FAQs
How long does a tile shower take to install?
7 to 12 days of active tile work, plus an additional 1-2 days for grout curing and sealing. The full project (including demo, plumbing, waterproofing, and finish work) typically runs 2-3 weeks. Custom slabs or natural stone may extend the timeline.
What’s the most durable tile for showers?
Porcelain tile. It has less than 0.5% water absorption, won’t crack under normal use, and lasts 25+ years with proper installation. Natural stone (granite, slate) is also extremely durable but requires sealing. Glass and ceramic work well for walls but porcelain is the top choice for shower floors.
Do you handle the waterproofing yourself?
Yes. We install Schluter Kerdi membrane or RedGard liquid membrane on every tile shower we build. This includes the walls, floor, niches, and shower pan. The waterproofing is the most critical part of the build — we don’t subcontract it.
Can you do mosaic floors, accent strips, and niches?
Yes. These are some of the most popular features we install. Mosaic shower floors are highly recommended for slip resistance. Niches are planned during framing (they need stud bay openings). Accent strips are coordinated to land at proper tile course lines.
What’s the difference between porcelain and ceramic tile?
Porcelain is denser, harder, and has less water absorption (under 0.5%). Ceramic is softer, easier to cut, and more affordable but has higher water absorption (3-7%). For shower walls, both work — for shower floors, we usually recommend porcelain or mosaic.
Why do some grout lines crack after a year or two?
Almost always because grout was used in change-of-plane joints (corners, where walls meet floor). Grout is rigid and can’t flex when the house moves slightly with seasons. These joints should be filled with silicone caulk, not grout. We always use caulk in these areas.
Can you match grout color to my tile?
Yes. Grout comes in dozens of colors. Matching grout to tile = subtle, calm look. Contrasting grout = makes the pattern more visible. We’ll bring samples during the planning phase so you can see the options on your actual tile.
What grout do you recommend for showers?
For most showers we recommend pre-mixed urethane or epoxy grout — both are stain-resistant and don’t require sealing. Standard cement grout works but requires annual sealing and stains more easily. For high-use primary bathroom showers, epoxy is the longest-lasting choice.
Can you tile around an existing shower pan?
Sometimes. If the existing pan is in good condition and waterproofed properly, we can tile new walls around it. If the pan is failing or wasn’t installed correctly, we recommend replacing it during the project to avoid future leaks.
How do I get started?
Call (508) 925-0396 or submit the quote form with photos of your bathroom and any tile inspiration images. We’ll schedule a free in-home visit, discuss material and pattern options, and follow up with a clear written estimate.
Ready for a Custom Tile Shower?
Schedule a free in-home estimate. We’ll measure your shower space, talk through material and pattern options, and follow up with a written estimate covering the tile work, waterproofing, and finish details.
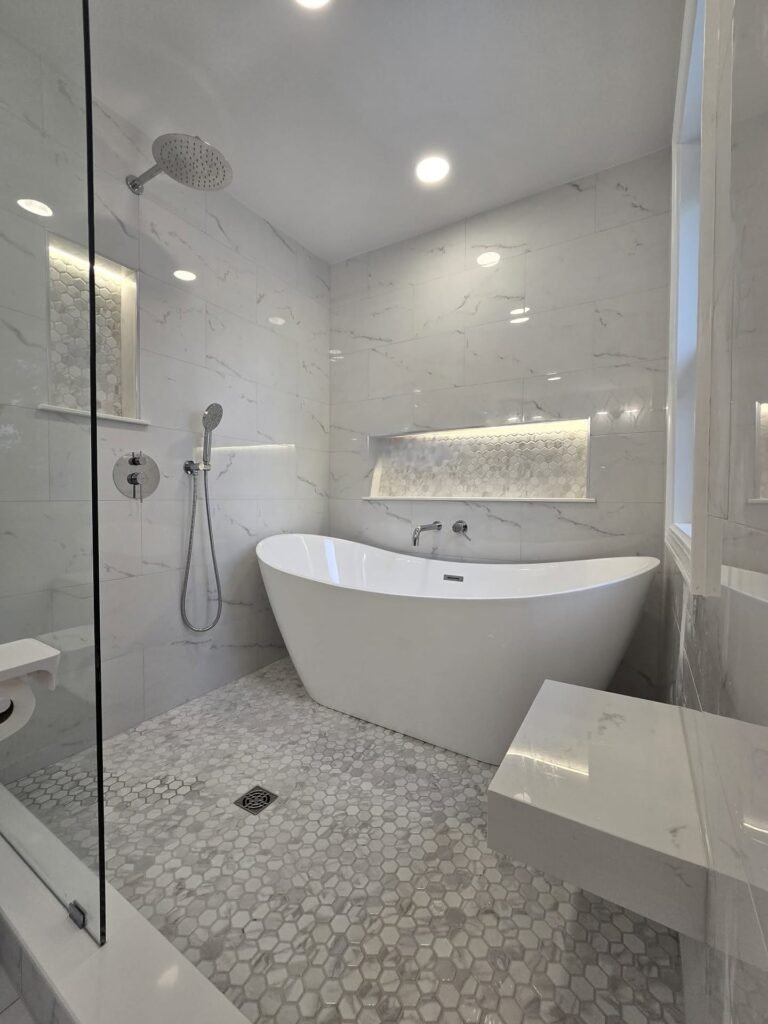
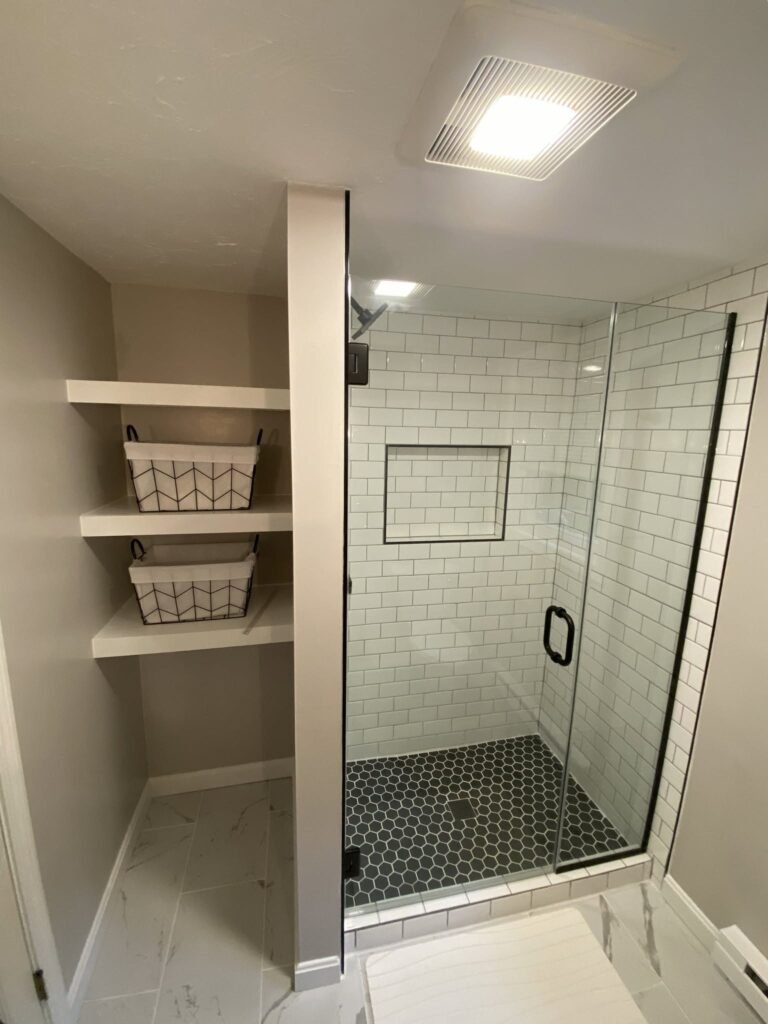
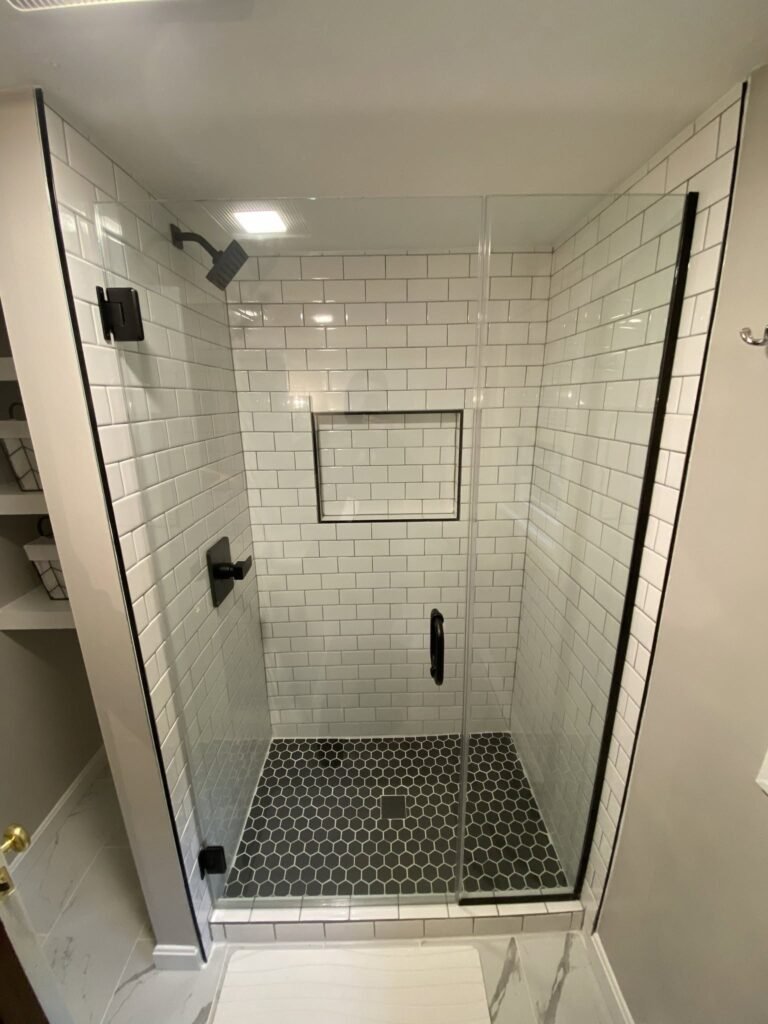
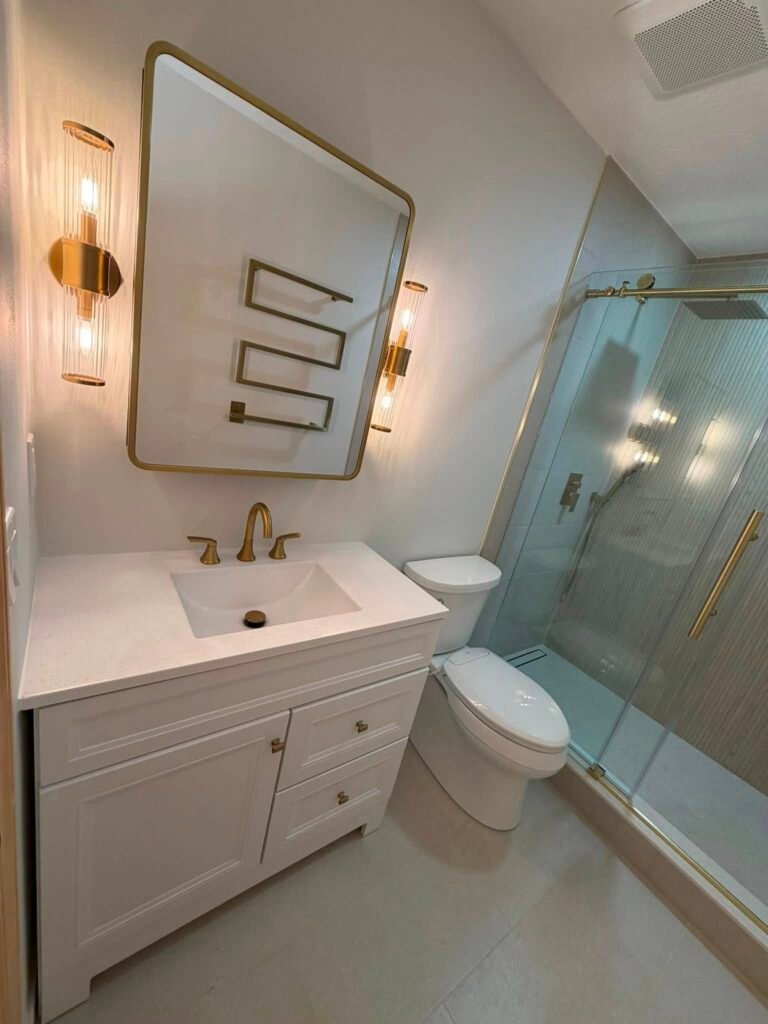
Recent Projects
A few real bathroom remodeling projects completed by our team across Worcester County & Central MA. View our full project gallery →

Explore More
Related Services
Cost Guides
Areas We Serve
Free estimate: (508) 925-0396