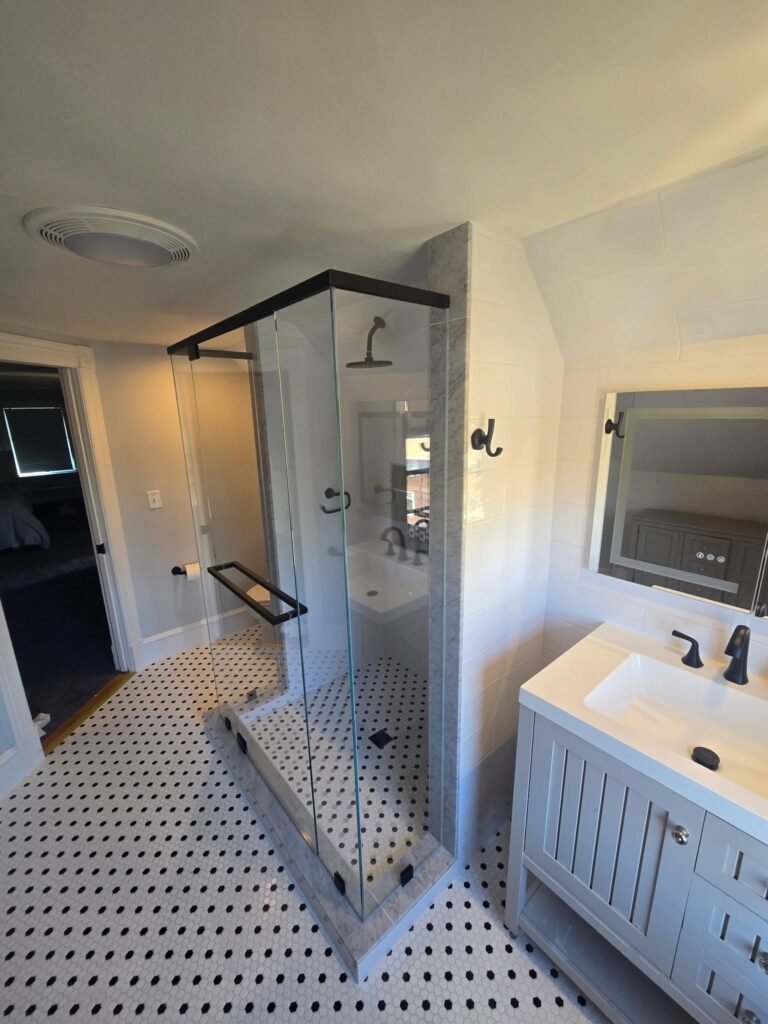
Walk-In Shower Installation in Massachusetts
Custom-built walk-in showers, designed and installed by licensed Massachusetts contractors. Tile, glass, niches, lighting, and waterproofing done right the first time.
Shower Specialists
A walk-in shower is more than a fixture — it’s a built-in part of your bathroom that has to handle daily water exposure for decades. Unlike pre-made shower stalls, a custom walk-in shower is constructed in place: framed walls, waterproof membrane, sloped pan, tile or surround, glass enclosure, drain, valve, and fixtures. Every detail has to work together, and the parts you can’t see (the waterproofing, the slope, the substrate) are what determine whether your shower lasts 25 years or starts leaking inside the wall at year three.
At JM All-Pro Services, we build walk-in showers from the studs out for Massachusetts homeowners — primary bathrooms, secondary baths, basement bathrooms, additions, and new construction. We do tile work in-house and coordinate licensed plumbing and electrical when changes are needed.
Anatomy of a Walk-In Shower
Most homeowners only see the finished tile, glass, and fixtures — but a properly built walk-in shower has roughly eight critical components, each one important to the long-term performance of the install:
The 8 Parts of a Custom Walk-In Shower
Walk-In Shower Sizes We Build
The right shower size depends on your bathroom footprint, layout, and how many people use it. Here are the size categories we work with most often in Massachusetts homes:
Walk-In Shower Configurations
The layout of your shower depends on the wall configuration available, traffic flow in the bathroom, and personal preference. Here are the configurations we install most often:
Alcove (3-Wall)
Three solid walls with glass on the open side. Most common configuration. Maximum privacy, easiest to waterproof, most cost-effective.
Corner Shower (2-Wall)
Two solid walls in a corner with glass on the two open sides. Returns floor space to the bathroom — feels more open than alcove.
Single Wall / Pony Wall
One solid wall (full-height or half-height pony wall) with the rest in glass. Modern, open look — common in primary bathrooms.
Neo-Angle Corner
Diamond-shape shower tucked into a corner with a 45° entry. Maximizes the corner space without taking up full wall lengths.
Doorless Walk-In
No door or glass — an extended shower space with a curved wall or splash partition. Open access, very modern feel.
Wet Room
The entire bathroom (or a section) is waterproofed and the shower has no curb or enclosure. Most accessible, most premium install.
Wall & Floor Material Options
What you put on the inside surface of the shower affects look, cost, lifespan, and how much maintenance the shower will need over time:
Porcelain Tile
Best Value- Lowest water absorption
- Huge style variety
- Easy to source replacements
- Available in large format (12″×24″+)
- Visible grout lines
Ceramic Tile
Budget Friendly- Most affordable tile option
- Easy to install
- Wide color & pattern range
- Higher water absorption than porcelain
- More limited size options
Natural Stone
Luxury- Premium look (marble, travertine, slate)
- Each piece is unique
- High resale appeal
- Requires periodic sealing
- More expensive material + labor
Large-Format Slab
Premium- Single panel — no grout lines
- Most modern, seamless look
- Easiest to clean (no grout)
- Higher fabrication cost
- Heavy — needs reinforced framing
Acrylic Surround
Fast Install- No grout lines to clean
- Fast install (1-2 days)
- Lower cost than custom tile
- Less design flexibility
- Shorter lifespan than tile
Solid Surface
Mid-Range- Seamless joints between panels
- Repairable surface
- Warm to the touch
- Limited color/pattern options
- Mid-range cost
Glass Enclosure Options
The glass is one of the last things installed and one of the most visible parts of the finished shower. Standard options:
Frameless
Thick 3/8″ or 1/2″ tempered glass with no metal frame. Cleanest look, easiest to clean, highest cost.
Semi-Frameless
Thinner glass with metal frame only at top/bottom or where panels meet. Mid-range cost.
Framed Slider
Aluminum-framed sliding door. Most affordable, no swing clearance needed.
Fixed Splash Panel
Single fixed glass panel for doorless walk-ins. Modern look, no moving parts.
Features Worth Considering Before You Build
These are the upgrades that are easy and cheap to plan now — and expensive to add later. We walk through every one with you during the estimate so nothing gets missed:
⚠️ Where Walk-In Showers Fail (and How We Avoid It)
Most shower failures aren’t because of bad tile — they’re because of mistakes in steps you’ll never see. Here are the most common install failures we’ve inspected on someone else’s work:
Insufficient Slope to Drain
Water has to flow to the drain at ¼” per foot minimum. Less than that and water pools, sits in grout, and finds its way through.
Cement Board Without Membrane
Cement board is water-resistant, not waterproof. Without a true membrane layer (Schluter, RedGard, etc.), moisture eventually reaches the framing.
Unsealed Corner Seams
The corners where walls meet, where walls meet the floor, and where the drain meets the pan — every seam needs proper sealing or it leaks.
Wrong Backer Behind Tile
Standard drywall behind shower tile is a common failure. Cement board or foam board (with membrane) is the correct substrate.
Drain Not Bonded to Membrane
Water finds the drain edge and runs down the outside of the pipe if the drain assembly isn’t properly bonded to the waterproof layer.
Grout Used Where Caulk Should Be
Grout in moving joints (where walls meet floor, corner-to-corner) cracks because it can’t flex. These joints need flexible silicone caulk.
📋 Massachusetts Code Requirements for Walk-In Showers
Massachusetts plumbing and building codes have specific requirements for new shower installs. Key items we always confirm during planning:
Some municipalities have additional requirements — we verify with the local building department before pulling permits.
Why Choose Us for Walk-In Shower Installation
Waterproofing Done Right
Schluter Kerdi or equivalent membrane system on every shower we build. Sealed seams. No shortcuts.
Tile Work In-House
We handle our own tile installation. No subcontracted tile crews with inconsistent quality.
MA Licensed
Construction Supervisor License #121166 and Home Improvement Contractor #214808 — both in good standing.
Permit Coordination
We pull plumbing and building permits when required, and schedule inspections so projects stay on track.
Detailed Written Estimates
Full scope, materials, labor, and timeline before work begins. No surprise add-ons.
Aging-in-Place Knowledge
Curbless designs, grab bar blocking, anti-scald valves, slip-resistant tile — we build with the future in mind.
Service Areas
📍 Massachusetts Towns We Service
Based in Clinton, MA. Walk-in shower installations across Worcester County, Middlesex County, and MetroWest:
Related Bathroom Services
Walk-In Shower Installation FAQs
What’s the smallest walk-in shower you’ll build?
32″ × 32″ is the smallest comfortable single-user size we build. Massachusetts code requires a minimum 30″ × 30″ interior shower dimension, but 32″ gives proper room for the body and elbow space. Below that, the install isn’t worth the cost — a 32″ corner shower delivers a much better daily experience.
How long does a walk-in shower install take?
3 to 4 weeks total. About 7-10 working days of construction (demo, framing, plumbing, waterproofing, tile, fixtures), plus 1-2 weeks for the glass enclosure which is templated after the tile is set and fabricated to size.
Tile vs. acrylic surround — which should I choose?
Tile lasts 25+ years and gives unlimited design flexibility but costs more in labor. Acrylic surrounds install in 1-2 days, are easier to clean (no grout), and cost less, but limit your design options and have a shorter lifespan (15-20 years). For a forever-home install, we usually recommend tile. For a quicker, simpler refresh, acrylic works well.
Do I need a curb or can I go curbless?
Both work. A 3-4″ curb is the standard and easiest to waterproof. Curbless (zero-threshold) is more accessible and modern, but requires precise floor framing to achieve the slope, plus more extensive waterproofing of the surrounding bathroom floor. We can build either — accessibility goals usually drive the choice.
What waterproofing system do you use?
We use Schluter Kerdi (a sheet membrane) on most installs, or RedGard / equivalent liquid membrane when conditions favor it. Both create a continuous waterproof barrier across walls, floor, corners, and drain penetrations. Cement board alone is not waterproof — it’s a backing for the membrane.
Do walk-in showers need a permit in Massachusetts?
New shower installations with plumbing changes require a plumbing permit and inspection. Building permits may also be required if framing or structural work is involved. We pull the appropriate permits and coordinate inspections as part of the project.
Can I add features like rain heads, body sprays, or steam?
Yes. Rain heads and dual valves are very common. Body sprays require additional water supply lines and a larger valve manifold. Steam showers require a generator, sealed enclosure, and a dedicated power circuit — we can spec all of these during the planning phase.
How do I keep the shower easy to clean?
Pick larger-format tile (12″×24″ or 18″×36″) to minimize grout lines. Use epoxy grout or seal cement grout. Choose a frameless glass enclosure with a hydrophobic coating (like ShowerGuard). Make sure the slope works correctly so water doesn’t pool. Properly built showers stay clean with minimal effort.
What if I have low water pressure?
Walk-in showers don’t change your home’s water pressure, but the shower head choice affects how the existing pressure feels. We help select fixtures with flow rates that match what your home actually delivers, so you don’t end up with a beautiful shower that disappoints under low pressure.
How do I get started?
Call (508) 925-0396 or submit the quote request with photos and approximate dimensions of your bathroom. We’ll schedule a free in-home visit, discuss configuration and material options, and follow up with a clear written estimate.
Let’s Design Your Walk-In Shower
Schedule a free in-home consultation. We’ll measure your bathroom, talk through size, configuration, and materials, and follow up with a written estimate for your project.
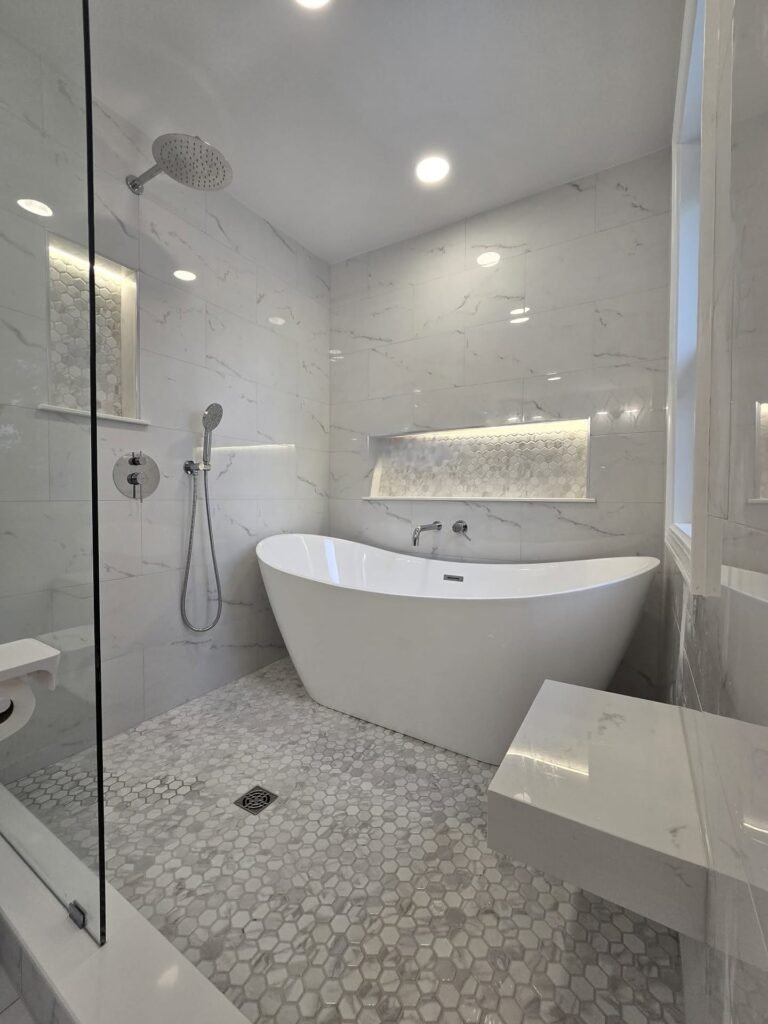
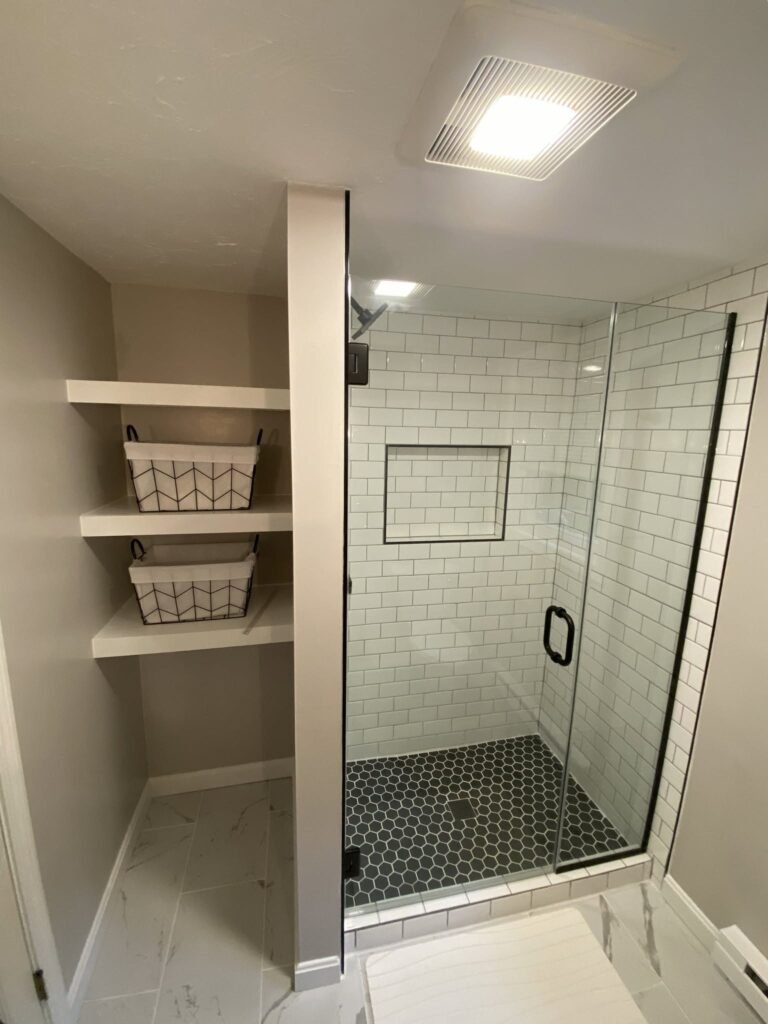
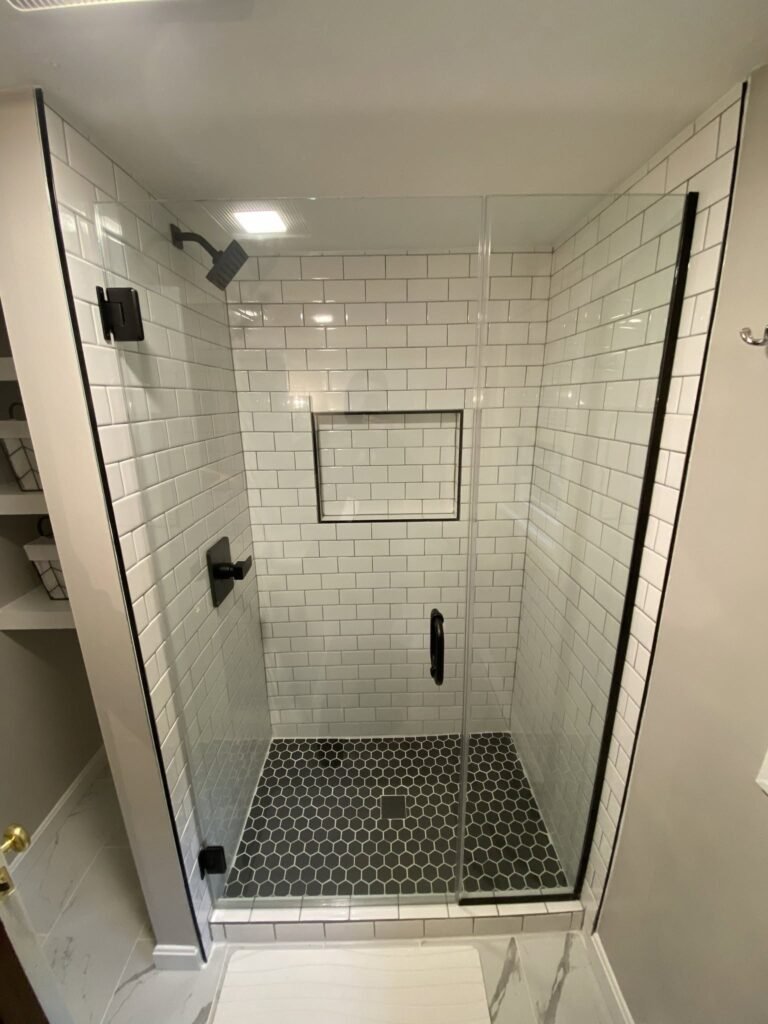
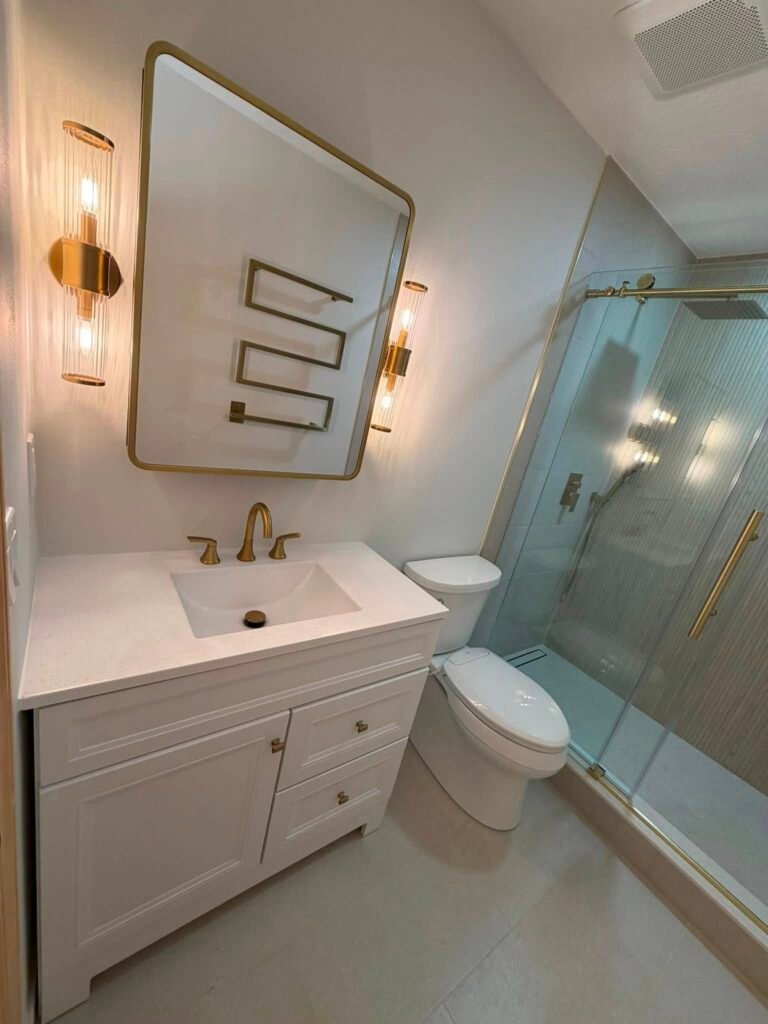
Recent Projects
A few real bathroom remodeling projects completed by our team across Worcester County & Central MA. View our full project gallery →

Explore More
Related Services
Cost Guides
Areas We Serve
Free estimate: (508) 925-0396